In the last few days, I had a very hectic schedule and didn’t have time to upload something on my Instagram account. But thankfully, my friend suggested to me that I can plan my posts or reels. So, after taking advice, I used the Instagram native’s scheduling feature. It is very easy to use, and I don’t even have to put in any extra effort to find the Scheduling option.
So, if you are interested and want to know other options as well, I have prepared this comprehensive guide. Thereafter, you can easily decide which option suits you well.
What Does Scheduling a Post Actually Mean?
On Instagram, you can plan your post even when you are stuck between your daily life challenges or forget to maintain daily consistency in advance for up to 30 days. By doing so, it lets you assign a specific date and time so that your content will automatically be uploaded. For executing that, Instagram has a native scheduling tool. Other than that, you can go for the Meta Business Suite or third-party social media scheduler tools.
Here are some advantages you get while scheduling:
- An effective audience scope, as your content will reach a wider group of people.
- Your content will go live when your target audience is highly active.
- You will get better quality control.
- Users can smoothly arrange a batch production of their targeted content.
- Various scheduling tools offer you clear analytics.
What Are the Challenges That I Have Faced During My Scheduling Time?
I tried to schedule my preferred Instagram content weeks ago. Here are a number of challenges that I faced while planning and how I overcame them.
- While scheduling content, Meta Business Suite and even third-party tools restricted my posts from doing so. It happens because I might be violating Instagram’s technical requirements. It results in missing content.
- I was trying to schedule my reel through third-party schedulers. And they usually face a challenge while setting up a certain personalized thumbnail. Or, even cropping a reel leads to the same difficulty. So, to overcome this, I tried to do it manually.
- While using third-party social media schedulers, I forgot that they don’t plan your content if it includes any links, sticker polls, or trendy music. For this, Meta Business Suite is the relevant option.
- Apart from that, I had already faced a penalty from Meta, as my account got temporarily suspended. So, I overcame this error by making sure that my account is a public one and by being sure to check that I have provided third-party access to it.
- In the last few weeks, I have scheduled my content various times in a single day. But I didn’t remember that led my target audience to seem to be fatigued. Moreover, I got lower engagement at that time.
How Can I Schedule Instagram Posts?
There are three different approaches to planning your Instagram posts along with your reels. Let’s check out the list of what I have already performed when my schedule seems to be busy.
- Native Scheduling by Using Instagram’s Built-In Feature.
- Planning Your Posts Via Meta Business Suite.
- Automate Instagram Reels and Posts Through Third-Party Tools.
#1. Native Scheduling by Using Instagram’s Built-In Feature.
This method is the most recommended approach that I am going to tell you. However, this solution doesn’t require you to connect your Facebook page. In short, if you don’t have any page, that will be totally fine. Besides this, this approach only takes my 10 to 15 minutes to properly schedule my content. So, if you don’t want to spend more time and your efforts, just follow the instructions below.
But proceeding further, here are some prerequisites that you have to go through.
- Use a public account rather than a private account.
- You are allowed to plan your 25 content in a day for up to 30 days.
- Your planned content will carry the same audience settings and privacy that were changed before the scheduling period.
Now, I will tell you two different scenarios: what I’d previously done and the correct steps that actually need to be done.
What Had I Previously Done?

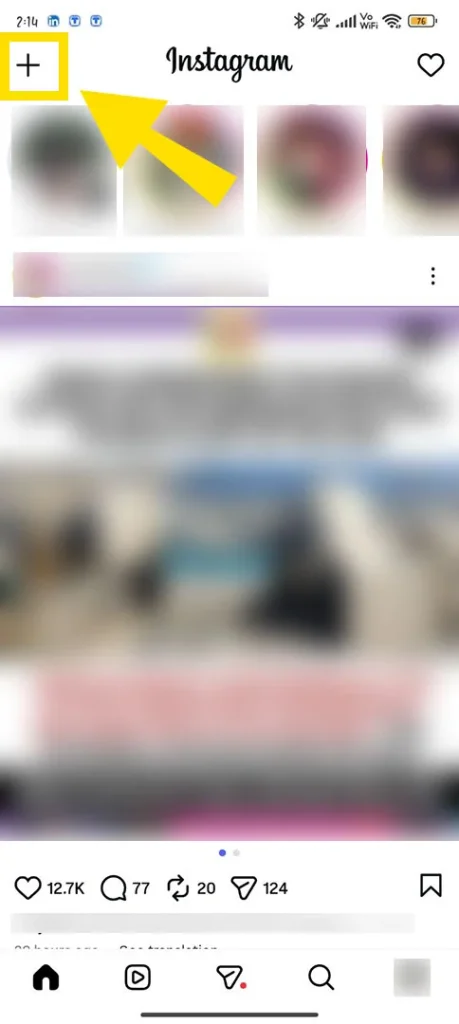
- Start creating a post by tapping on the + sign at the top.

- On the screen, I saw that the scheduling post option is not available.
- After that, I googled my query, “Why am I not getting the scheduling option?”
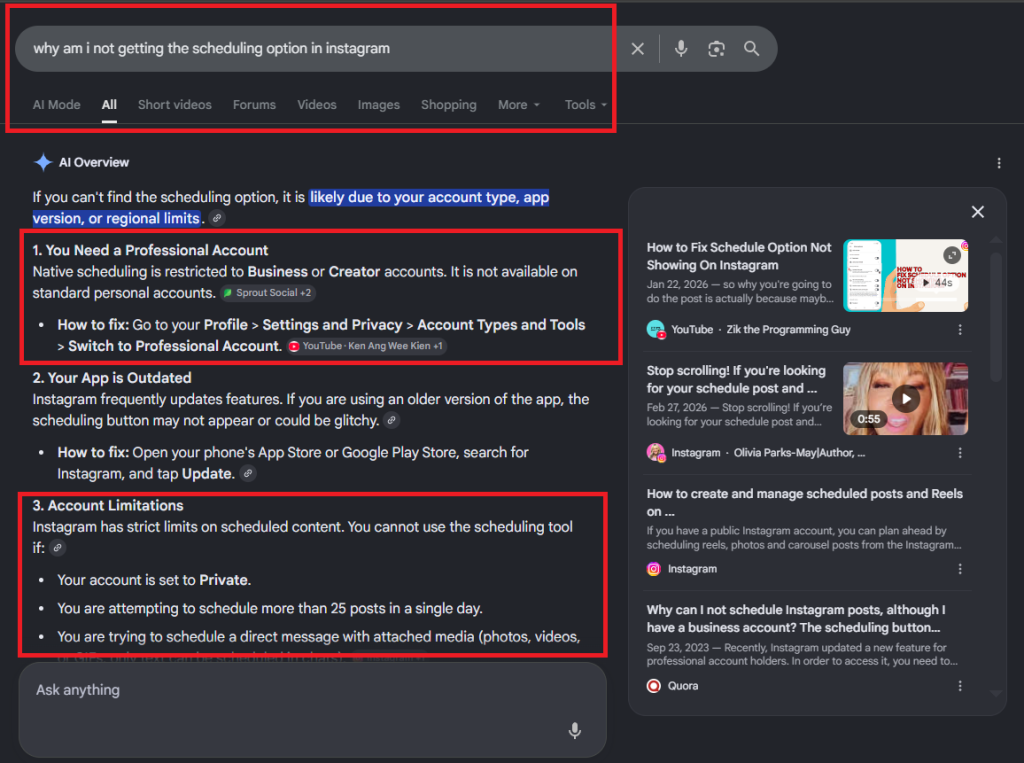
- Then, I checked my account settings, where I found that the Account Privacy had changed to Private.
Pro Tip! You just need to make sure that you are using a public account instead of a private one.
What Actually Steps Needs to be Done?
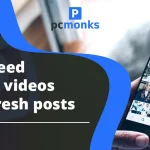
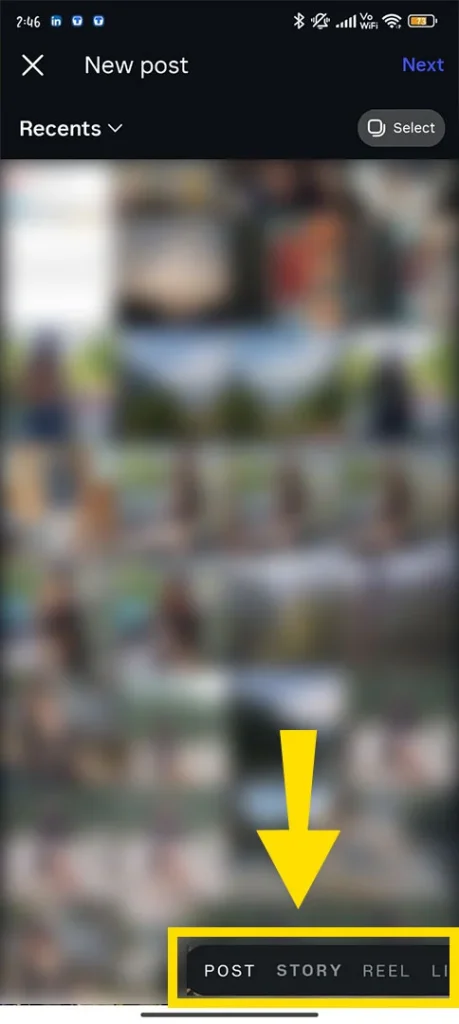
- After opening your Instagram, tap on the “+” sign.
- Choose what you want to upload: a Reel or a Post.
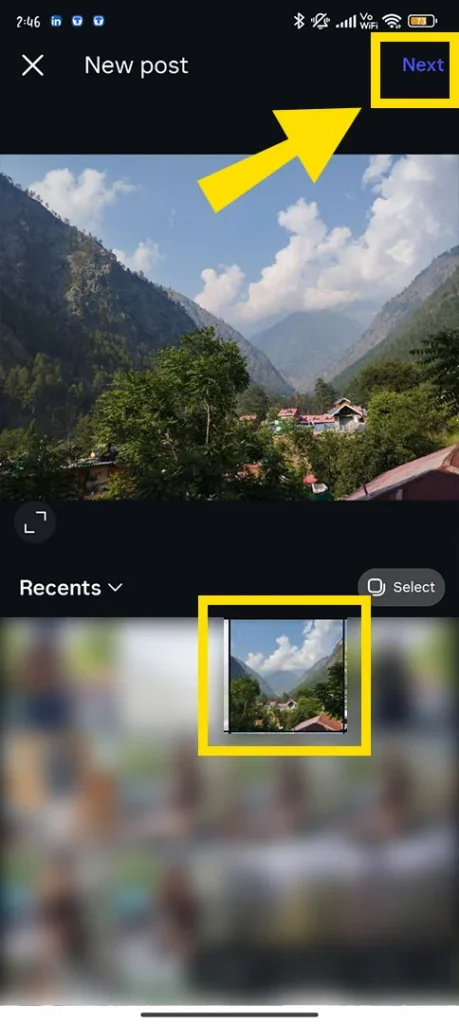
- Pick your preferred photo or video. Tap on Next.
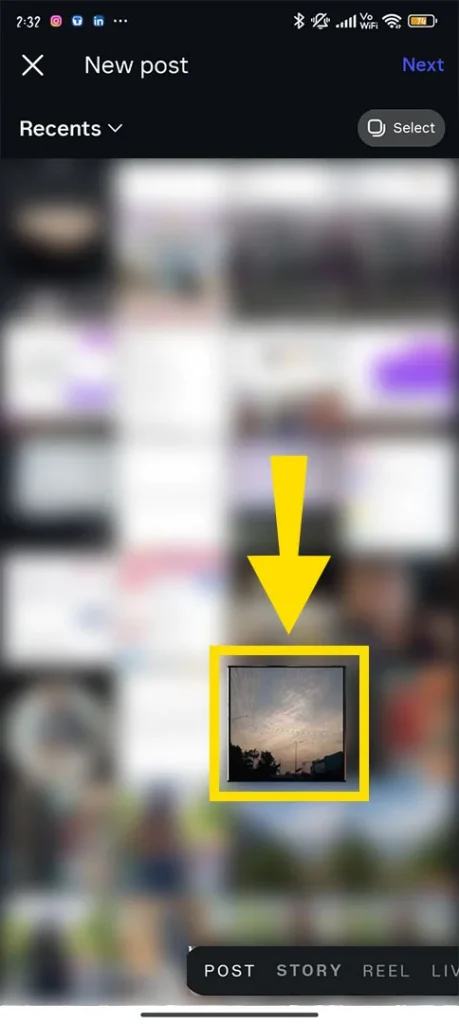
- Add caption or music as per your need.
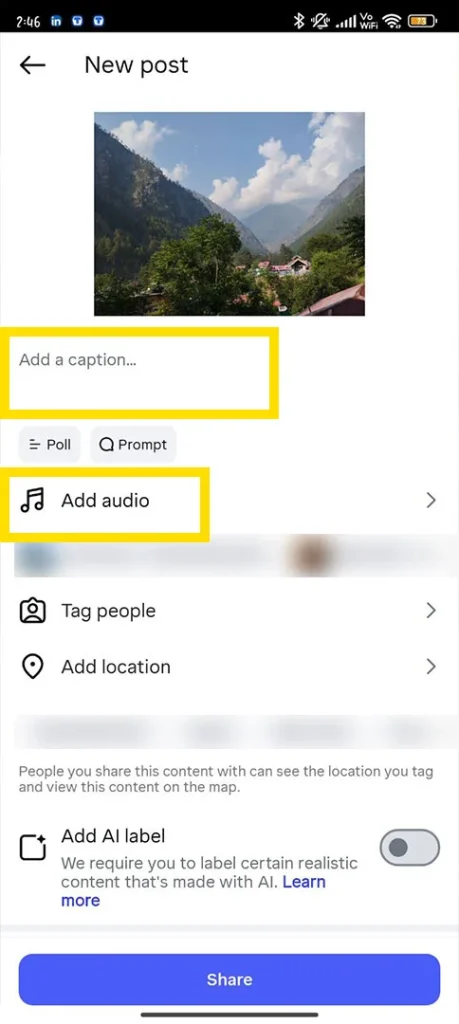
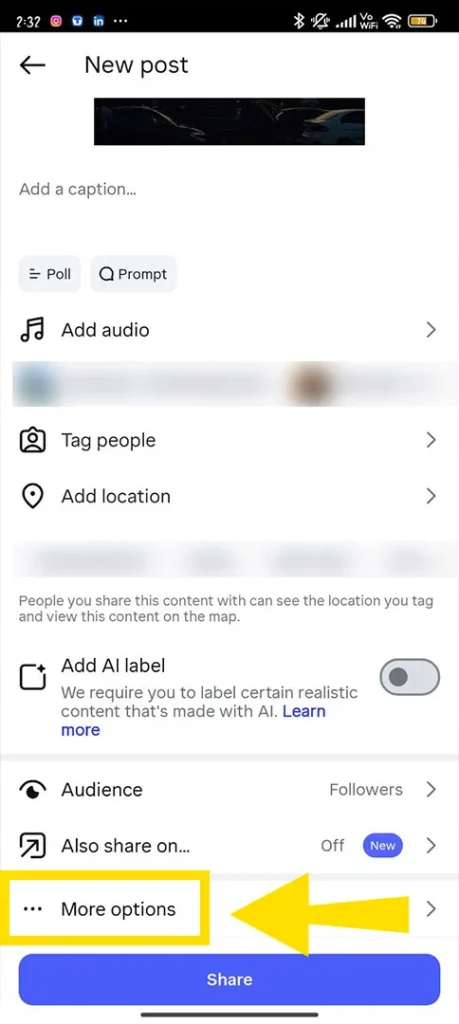
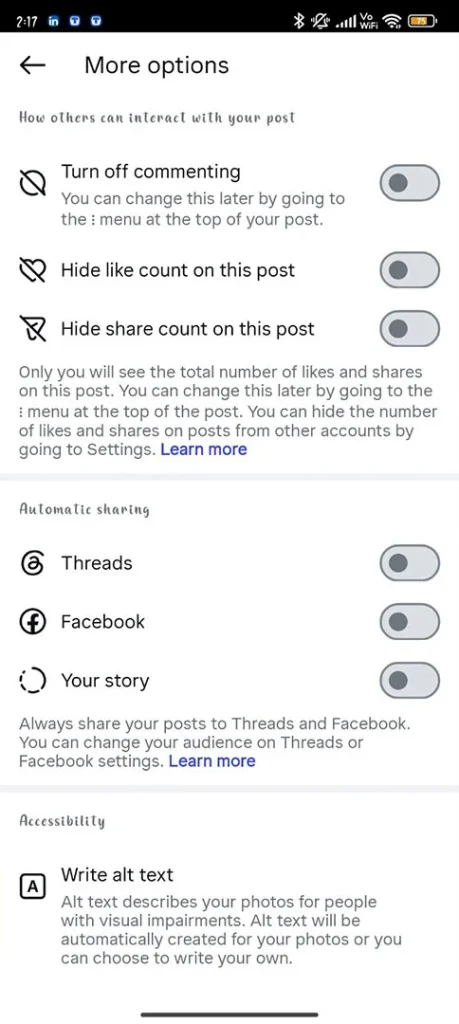
- Scroll down and find More Options.

- Tap on it and look for “Schedule this Post” or “Schedule this Reel.”
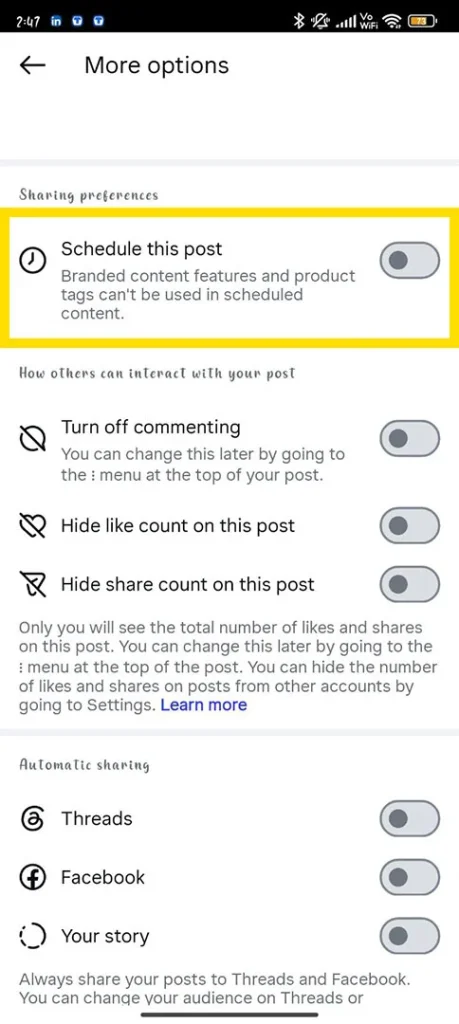
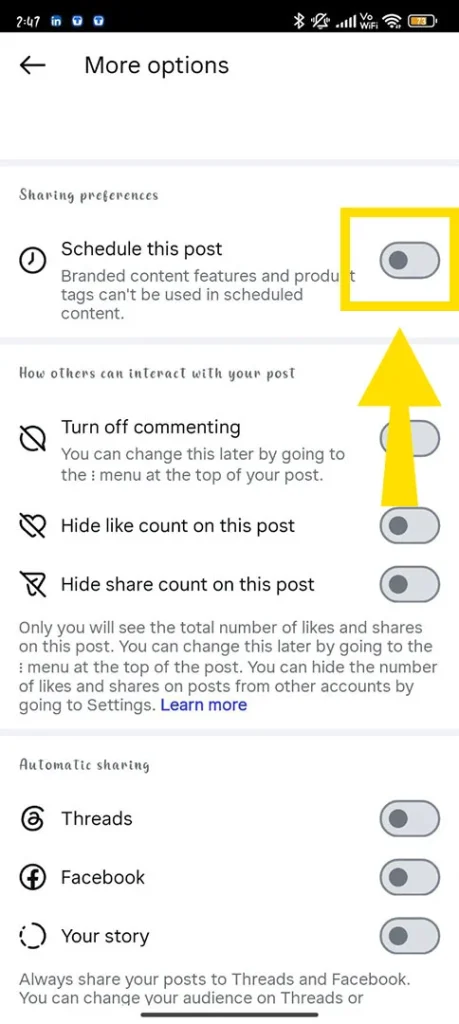
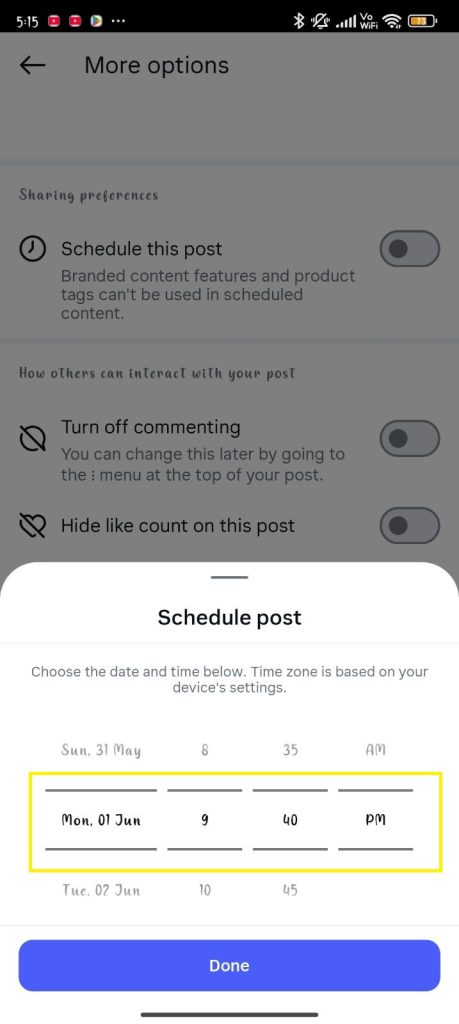
- Set the time and date to your preference.
#2. Planning Your Posts via Meta Business Suite
Meta Business Suite is a centralized hub where users can seamlessly manage all their post scheduling in a single platform. Besides this, it is highly accessible on both devices, desktops and mobiles, so there is no need to worry at all.
Note! For that, you must have a Facebook page that should be connected to your Instagram account. So, if you don’t know how to do so, go through these instructions, whether you have an Andrid or iOS device.
- Access Meta Business Suite.
- Enter the login credentials of your Facebook page.
- Choose Three Horizontal Lines or More.
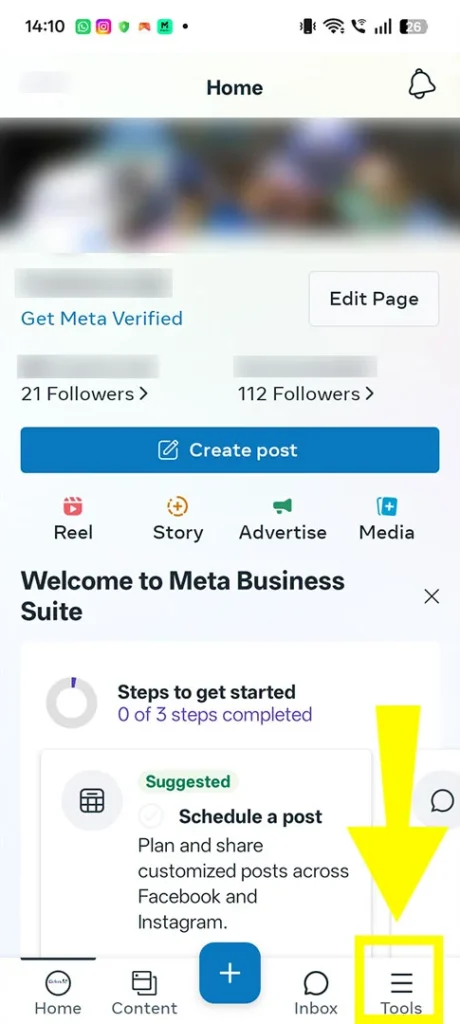
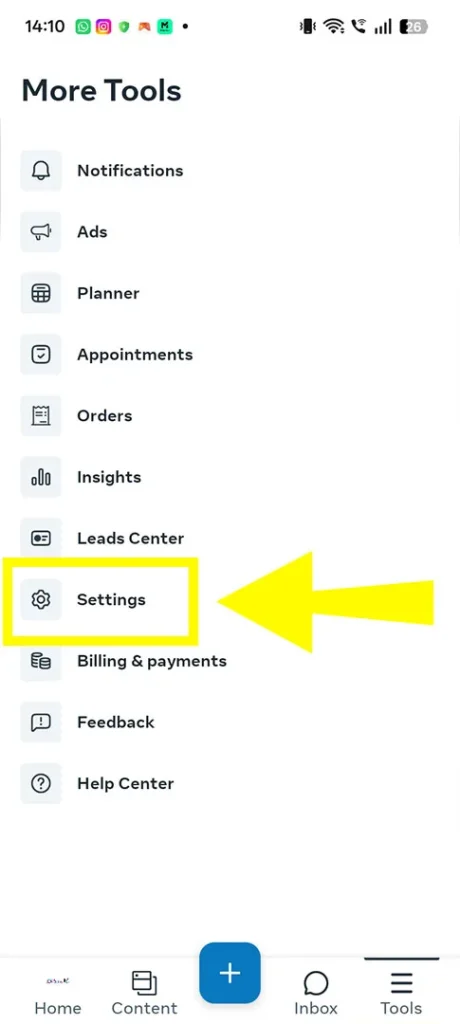
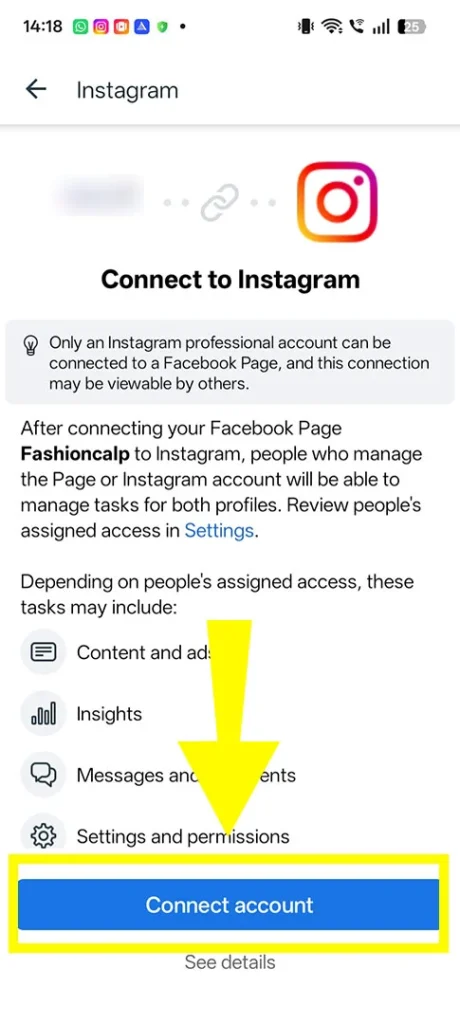
- Tap on “Connect” besides Instagram under the “Page Settings” category.
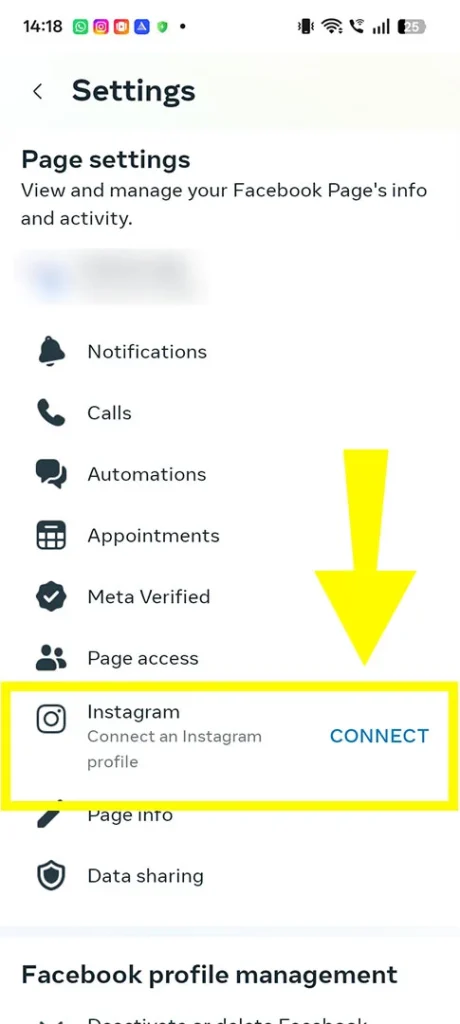
- Here, you need to log in to your Instagram account, including ID and password.
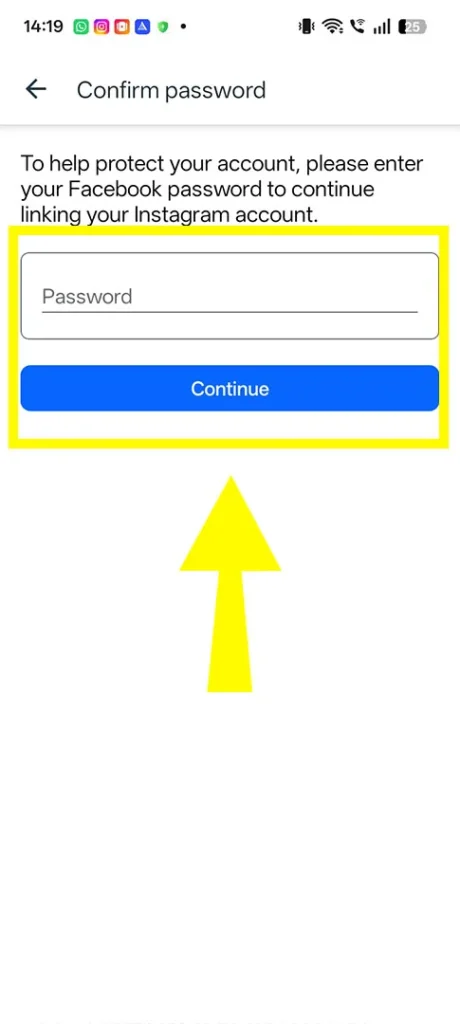
- That’s all! You’ve now connected your account.
Now, let’s discuss how you can effortlessly plan your Instagram reels and posts.
On Your Desktop
- Enter your email ID and password for your business account.
- Right now, you can start creating your post by opting for different tabs:
- Home
- Post
- Stories
- Planner
- Go with the Create Post or Story option.
- Choose where you want to upload your post. Here, I am opting for the Instagram feed.
- Click on Upload Media. With this option, you can add your preferred media, whether it is your photos or a video.
- You can also personalize your photos with the help of the built-in tools. It can help you to add a filter, crop, upload stickers, or add text.
- Here, see the preview on the right-hand side.
- Click on the arrow to choose Schedule your Post or Story.
- Users can also see their record of scheduled posts and stories. Apart from that, there is an option to upload it to the Grid or Feed.
On Your Mobile
Here, I am performing on my iOS device. So, if you have an Android device, you can also find the below options.
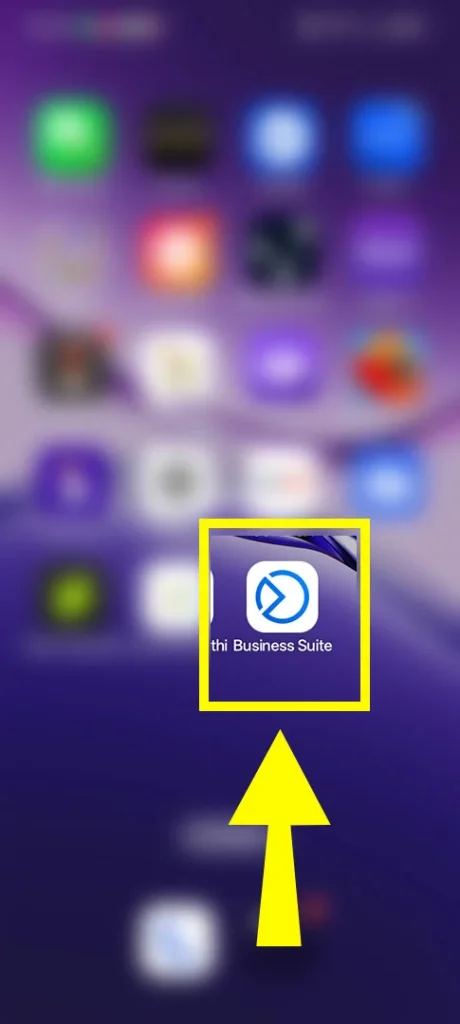
- Launch the Meta Business Suite application.
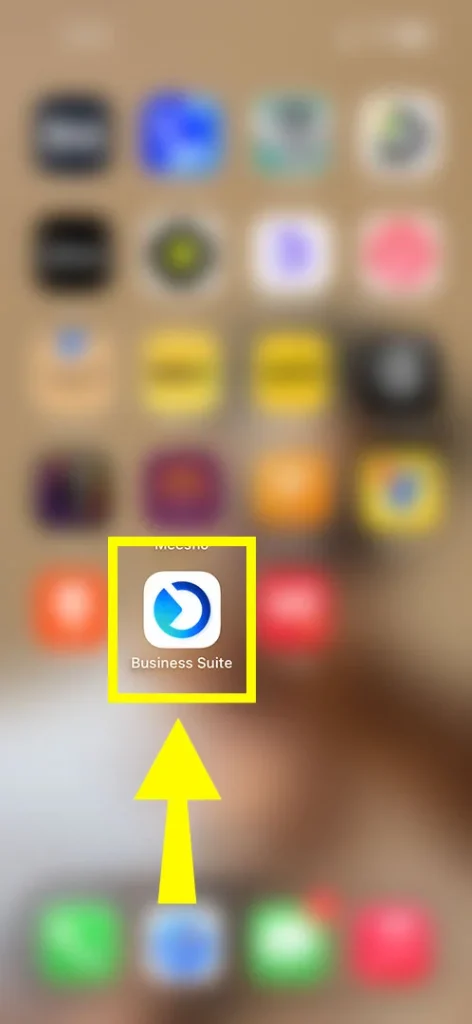
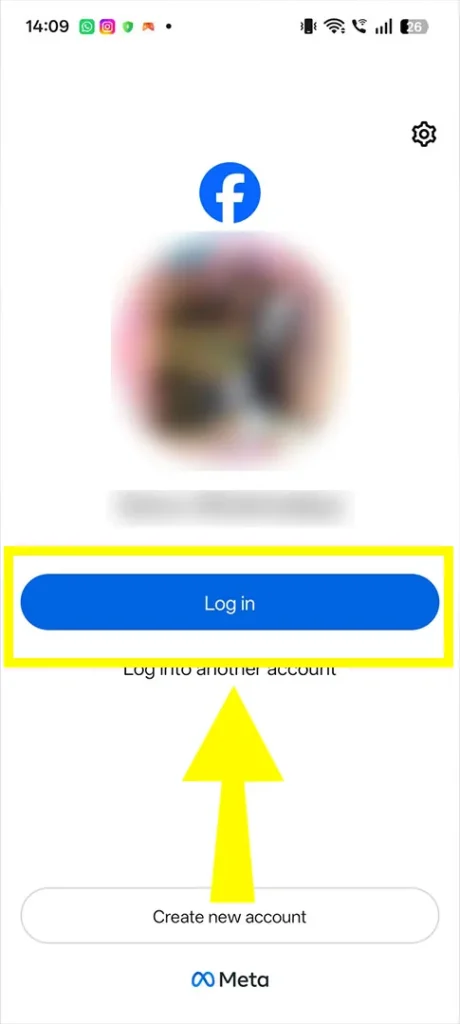
- Start using it by entering your Facebook page email ID and password.

- Tap on the + or Create icon.
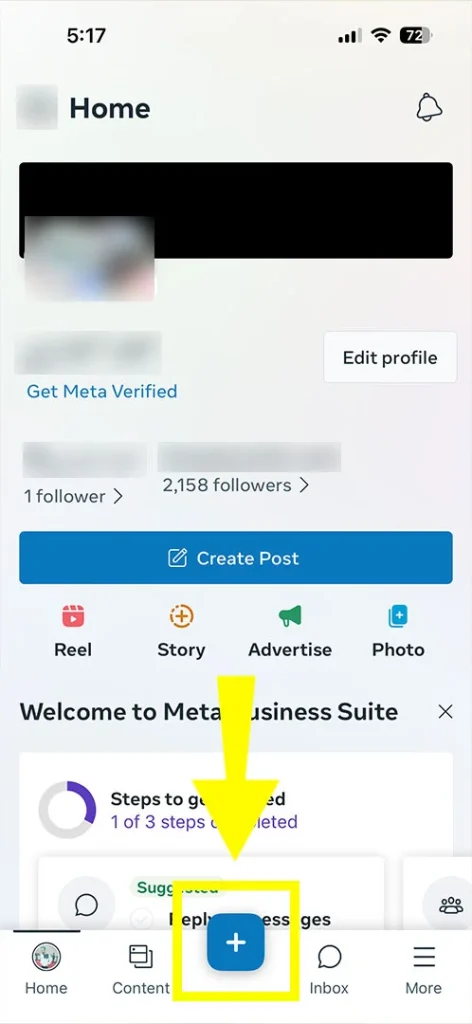
- It will help you to create a story, post, live, or ad.
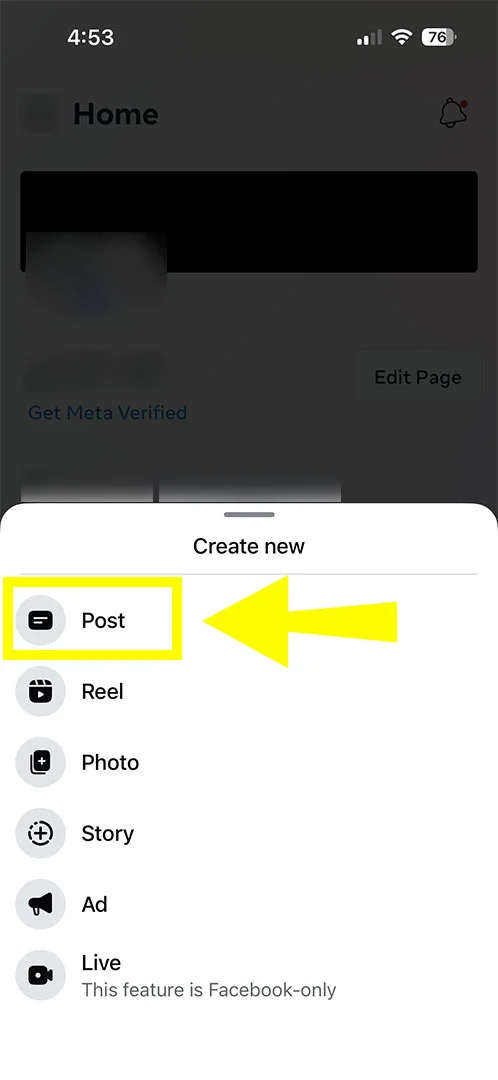
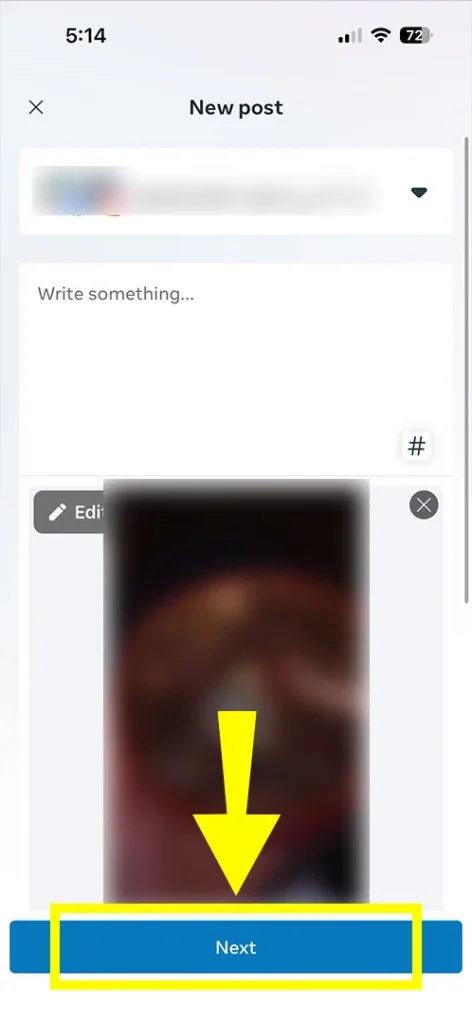
- Proceed further by tapping on Next.
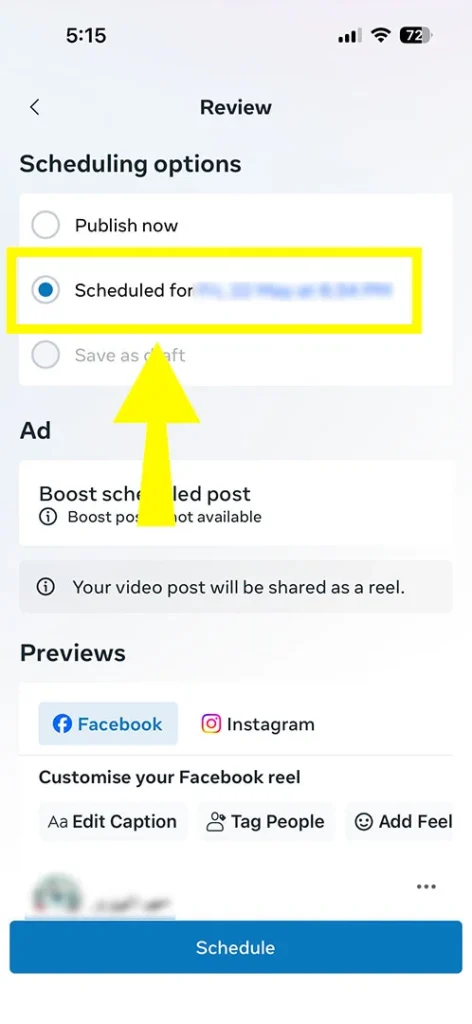
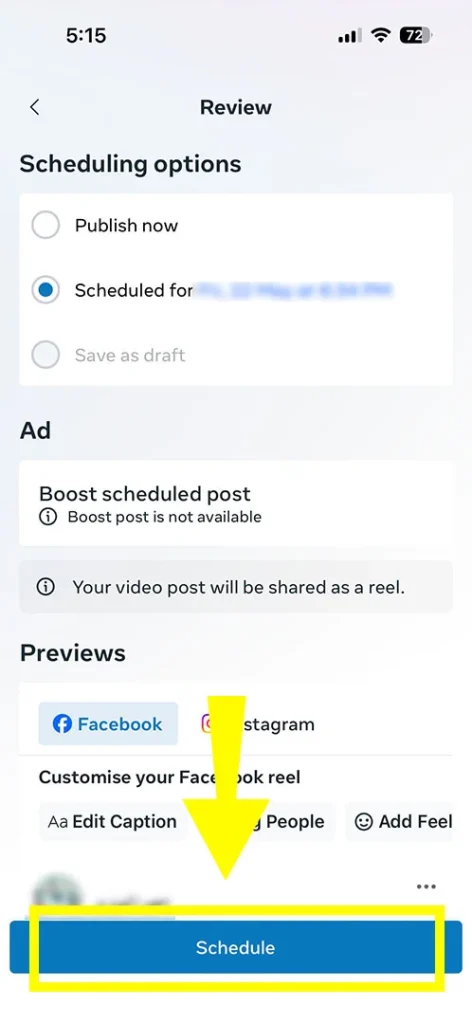
- Opt for Schedule for later, Publish Now, or Save as Draft under the “Scheduling” category.
- Once you’ve chosen “Schedule for later,” you can also view whatever you’ve published or scheduled.
- Go with the Content section. It is located in the bottom menu of the application.
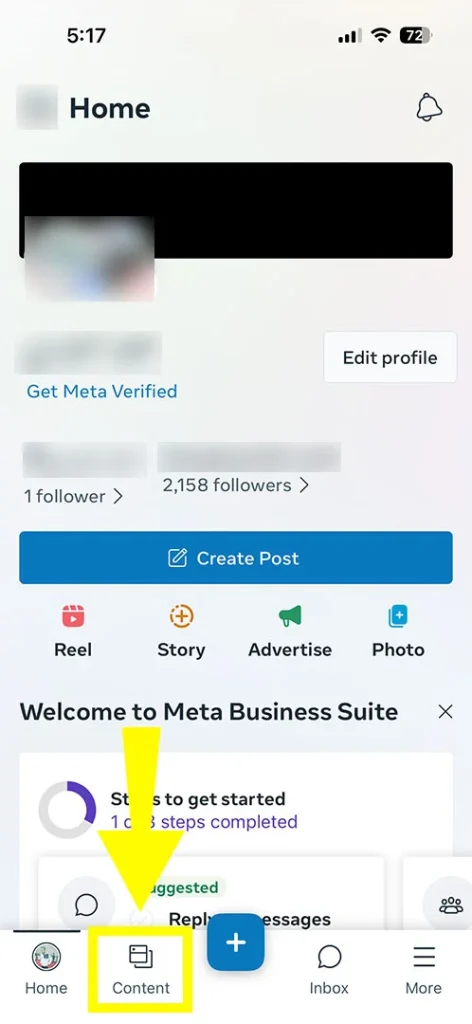
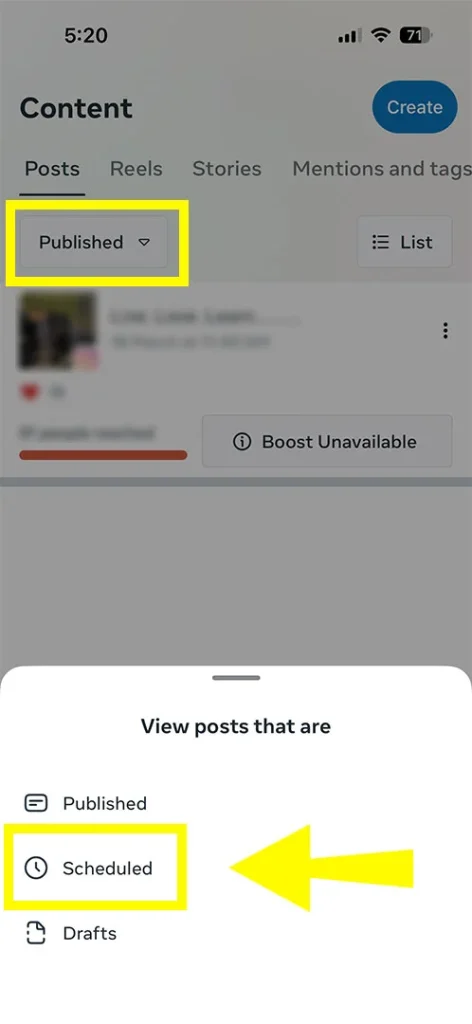
- The app offers you several options so that you can view your posts. These are:
- Published
- Scheduled
- Drafts
Note! If you want to view your story, you will only be able to view scheduled, active, or archived stories.
#3. Automate Instagram Reels and Posts Through Third-Party Tools
First, understand that there are various third-party tools through which you can smoothly schedule your Instagram posts.
Tools are as listed below:
- Buffer → This third-party social media management tool is highly recommended, as it offers you an easy-to-understand user interface. Plus, it allows its users to take a free trial for up to three different channels.
- Later → You can smoothly schedule your visual content. In addition, it offers you a visual grid planner.
- Hootsuite → By having this tool, you will get analytics regarding your scheduling posts, like when most of your audience is active.
- Storrito → It is one of the third-party tools that lets you schedule your posts in your IG account.
- Publer → After accessing this third-party tool, you can easily manage a number of Instagram accounts.
Now, it’s time to understand how you can actually use such third-party social media management tools. Here, we are using Buffer.
- Search for Buffer social media management tool. Find the first tab and tap on it.
- Log in to it by mentioning the necessary credentials.
- Choose your Instagram account.
- Open Composer.
- Choose to schedule your content, either a Reel, a Story, or a Post.
- Upload the media you are willing to add.
Important Points to Be Considered!
- Upload video within 300 MB or less than that.
- If you are scheduling your story with numerous videos or images, Buffer only allows you to plan each piece of content separately for each story.
- Enter the caption of your preferred media.
- Here, you can choose between the two options:
- To publish automatically.
- Notify Me or to schedule as a notification.
- Just schedule your post by opting for any of them.
- And that’s it!
What Not to Schedule: My Instagram Anti-Strategy
However, Meta doesn’t penalize when you are scheduling your reels and photos. But you should focus on a few things that will help you out. These are some of the anti-strategies that definitely work for me.
1. Reels That Are Using Trending Audios
Usually, I was used to scheduling reels by using the trending audios through third-party sites. But these sites won’t be able to plan the post. As a result, Instagram’s API blocks publishing content completely. In addition, I only get a silent video.
That is why I am recommending you not to go with that. If you want to still schedule your reel, you should go with the native scheduling feature.
2. Time-Sensitive Trends or News
Instagram’s algorithm focuses on timely management and authentic content. Moreover, I strictly avoid scheduling my posts regarding any breaking news or latest trends. As a result, it makes my brand outdated when the time comes to go live.
So, to fix this problem, I scheduled my post manually so that I can smoothly interact with my target audience. Plus, it helps me to reply to other comments and know what’s going on in the market.
3. Posts That Require Native Interactive Features
Multiple features are available that aren’t compatible with external scheduling tools. These include product tagging, adding stories by uploading stickers, sponsored content, collaborative posts, and fundraisers. Moreover, I have done manual scheduling.
Alternatively, I suggest you go with the Meta Business Site option rather than opting for any third-party tools.
4. When You Can’t Engage With Your Audience
As of 2026, Instagram’s algorithm prioritizes content that heavily generates shares, saves, and comments in the first few hours. So, don’t make the same mistake that I have already made, like after scheduling the post, forgetting to engage with my audience.
If you also do the same, you will lose the opportunity to answer questions, pin top comments, and build early momentum.
5. Content With Aspect Ratio Violations
Instagram has an automated system that requires your videos or photos to fit certain height-to-width ratios. Make sure to add the perfect-sized media that I missed during my scheduling period.
Automatic vs. Notification Publishing—Which is Right for My Post?
By going through the following table, you will get your answer as to which option is perfect for you.
| Feature / Factor |
Automatic Publishing |
Notification Publishing |
| Definition |
Posts will be published automatically at a certain scheduled time. Moreover, it doesn’t require human intervention. |
The scheduler sends you a notification. So, users are required to open the Instagram app. After that, tap to publish. |
| Supported Content Types (2026) |
- Feed posts
- Carousels
- Reels
Meta Business Suite or various third-party social media management tools can approve it. |
- Stories
- Posts with interactive stickers
- Some advanced Reels formats.
|
| Workflow |
Set a date or time. Thereafter, the scheduler will post automatically. |
Set a date/time. Then, get a reminder. Further, manually compose or post. |
| Tools |
- Meta Business Suite
- Creator Studio
- Third-party social media management tools, like Later, Hootsuite, or Buffer.
|
- Instagram app reminders
- Third-party schedulers when the restrictions of the API apply.
|
| Account Requirements |
Business or Creator accounts only; personal accounts are not allowed to auto-publish. |
Works with all account types, including personal. |
| Advantages |
- Saves time and effort.
- Ensures consistency.
- Perfect for agencies and bulk scheduling.
- Reduces the risk of scheduled posts.
|
- Full creative control while posting.
- Supports all formats that are not AI-enabled.
- Avoid publishing errors with unsupported features.
|
| Limitations |
|
- Less efficient.
- Risks of missing reminders.
- It requires manual effort at an exact time.
|
| Best Use Case |
Agencies, Brands, or Creators that need consistent reels or posts published at a large scale. |
Creators or influencers who totally rely on interactive features, Stories, or last-minute edits. |
Sources: Later and Buffer.
Decision Tip
- If you want to manage your multiple campaigns or accounts to get efficient results at a large scale, you should go with automatic publishing.
- If you are willing to manage your Stories for interactive content and creative flexibility, notification publishing is the best option for you.
Key Considerations!
- Meta Business Suite is one of the most reliable and trustworthy options for auto-publishing carousels, posts, and Reels.
- Stories scheduling can also be possible, but only for basic formats. Remember one thing: if you are willing to auto-publish your stories that include interactive features, you should go with notification publishing.
- Third-party social media management tools, such as Hootsuite, Buffer, or Later, allow you to schedule in bulk, add collaborative features, and cross-platform workflow. However, these tools can be set to notification publishing by default. Moreover, it totally depends on the permissions of the Instagram APIs.
- Auto-publishing can save your time, but you still monitor DMs and comments manually so that you can maintain an engagement level. Plus, make sure to avoid policy violations.
Which Scheduling Method Should You Use? (Decision Guide)
Review the following decision guide that can be beneficial for you.
For In-App Native Scheduling Option
It is perfect for solo creators who want simple feeds.
- Best For: Single reels, images, and carousels.
- Pros: It doesn’t require you to create new accounts. Moreover, it is highly convenient.
- Cons: You can’t schedule your stories, and you can only plan your content for up to 30 days.
For Meta Business Suite
This option is ideal for small business creators and owners who actually want to handle their Instagram and Facebook accounts at the same time.
- Best For: Reels, Posts, and Stories.
- Pros: It is a 100% free platform that offers you to add AI-generated captions and allows you to show engagement analytics.
- Cons: Its interface is a little bit complicated, so beginners can face challenges while performing the steps.
By Using Third-party Schedulers
Social media managers, brands, and agencies usually use third-party social media management tools. In addition, they can smoothly handle multiple platforms simultaneously.
- Best For: All content formats, including your stories, plus you will get a visual grid and the capabilities of bulk scheduling.
- Pros: Automatically, your story will be uploaded, and it offers you advanced analytics.
- Cons: You need to pay some amount for taking a subscription to access the advanced features.
How Can I Manage My Scheduled Posts?
I have four different options to manage your planned posts. You can choose any of them after seeing the steps.
From Your Profile:
- Open your Instagram profile.
- Go to Menu.
- Move towards the Scheduled Content under Your Insights and Tools.
- Tap on Options just beside your chosen reel or post you are willing to edit or modify.
- Here, you can opt for whether you want to delete, edit, or reschedule your post.
While Creating a New Reel or Post:
- Tap on + Create.
- Choose Reel or Post.
- Tap on Scheduled Content to view.
- Choose the content you want to edit.
- Here, you can go with various options:
- Share Now
- Reschedule
- Delete
- Edit Post.
On Desktop With Meta Business Suite:
- Search for Meta Business Suite and log in to it.
- Make sure to enter your Facebook Page credentials.
- Be sure to connect your Instagram account and then choose it.
Note! If you haven’t done it yet, you can follow the above steps to do so.
- Click on Planner.
- It will help you to see your content calendar.
- Click on the scheduled reel or post you are willing to manage.
- Click on the three dots. You will get three options:
- Edit the media and caption.
- Reschedule
- Delete the post.
By Using a Third-Party Tool:
- First, convert your account to a Creator or Business one.
- Link your account with your Facebook page.
- Choose your preferred third-party scheduling platform.
- Log in to it. Afterwards, follow the on-screen prompts.
- View the scheduled content and find the Edit option.
When Should You Schedule Your Instagram Posts and Reels? My Winning Formula
Users should plan their content after noticing and understanding when their target audience is coming online.
Before You Begin:
- Must have a public or a professional account to access it.
- The Instagram insights feature is not available for the newly created public account.
- If you have just switched your public account to a private one, you will lose access to Insights. Retrieving data is only possible if you convert your account to a public one within 90 days.
- If you want to know your audience demographics, make sure to use preset timeframes, and the reach must be over 100 accounts.
Now, proceed further to understand how you can check the timeframes of your target audience.
- After switching back to your professional or public account, move towards the Dashboard option.
- For a professional account, choose Insights that will be below For Professionals.
- For a personal account, opt for Your Insights and Tools, where you’ll get the option of Your Dashboard.
- Choose Account or Content under the Insights.
- Set the date range for how long you want to see.
After understanding your audience demographics, you can post your reel by noticing the following timeframes that I am going to provide you.
| Day |
Best Time(s) |
Notes |
| Monday |
7:00 PM |
Avoid early morning, as users are adjusting to the work schedule. |
| Tuesday |
Late afternoon or evening |
These windows tend to perform best. |
| Wednesday |
12:00 PM |
Highest overall engagement |
| Thursday |
8:00 AM – 9:00 AM |
Morning windows usually outperform evenings |
| Friday |
10:00 AM – 11:00 AM |
Top-performing day specifically for Reels |
| Saturday |
Late afternoon or evening |
These windows are expected to perform best. |
| Sunday |
8:00 PM – 9:00 PM |
Users are closing down before the new week |
Plus, it is 100% proven, as I usually schedule my posts at these times to get better engagement.
Instagram Scheduling Posts Errors and Troubleshooting: The Fix-It List
Now, let’s discuss some common errors about Instagram scheduling posts. Afterwards, we will elaborate on the troubleshooting section.
Error 1: Expired Authorization Tokens
This error simply means the digital key securely connects your Instagram account with a third-party social media management, website, app, or business tool that is now invalid or outdated. This problem is caused by:
- You may have updated your connected Instagram or Facebook account, which automatically expires the token for security purposes.
- According to Meta, user access tokens will expire in 60 days for security reasons.
- Sometimes, users may have removed the integration from each other’s apps.
So, to fix this error, follow these workarounds:
- Whether you are using Meta Business Suite or any third-party management apps, you just need to refresh the connection. Just remove it and reconnect it with your app.
- If you upload your content to the website’s Instagram feed, follow these instructions.
- Access the Facebook for Developers portal.
- Go to your App Dashboard.
- Move towards the Instagram Graph API and start generating a user access token.
- Paste it into your plugin settings on your website.
- Otherwise, you can switch from your desktop to your mobile to get rid of temporary or technical errors.
Error 2: Missing Page Connection
This issue means that the connection between the Instagram account and the Facebook page has been lost. In addition, it disrupts various features, such as shopping tags and cross-posting, as well.
To get rid of this error, you can follow the troubleshooting fixes below.
- Make sure to check the admin page rights. In short, just verify that your personal Facebook account has full admin or control access that should be connected to your Facebook page.
- After this, you can try to disconnect and then reconnect your account.
- Verify that both your Facebook page and Instagram profile must be public or business ones.
- Alternatively, you can simply erase the app cache or just reinstall the app.
Error 3: Incorrect Account Type
This is another issue that appears while scheduling your Instagram posts. The “incorrect account type” error means that users are trying to plan the content on a private account. But there is an actual requirement of a Creators or a Business account.
Here are some proven instructions that will help you out.
Error 4: Media Type Not Supported
This error usually happens when you are trying to upload content that is not compatible with the system’s technical requirements. Or sometimes, users encounter this problem because there might be some temporary bugs within its API or app.
Below are some quick fixes that you can implement.
These are some technical requirements that you should keep in mind.
- For Images:
- You can go with PNG or JPG, which should be beneath 8 MB, with the aspect ratios of 4:5 and 1.91:1.
- For Videos:
- MP4 and MOV are highly recommended formats that should be under 5 MB. And make sure it should not be too long or too large for your posting type.
Error 5: Mismatch of Timezone
You typically face this error because while scheduling the preferred content, your phone and Instagram’s servers are set up in different time zones.
These are the possible instructions that you can go through.
Error 6: Instagram Scheduled Reel Not Publishing
Reels music copyright restrictions, unsupported video specifications, or temporary technical glitches often cause this error.
Here are the most recommended troubleshooting solutions.
- Remove trending audio.
- Manually try to schedule.
- Verify your account status.
- Try desktop rather than your mobile device.
- Connect your Instagram account.
Common Mistakes You Need to Avoid While Scheduling Instagram Posts
These are some common mistakes that every user usually makes. And how they can easily avoid them for better scheduling.
- Without keeping a record of content, you keep scheduling your post.
How to Avoid It: Map out what you’ve scheduled the content for. Take a quick glance at your social media calendar.
- Ignore the best times to schedule your IG content.
How to Avoid It: You should check out Instagram Insights to know when your target audience is coming online.
- You are scheduling non-evergreen content as a recurring one.
How to Avoid It: You should opt for categorized content queues rather than repeating the same cycle. And make sure to go with your social media calendar.
- Totally relying on your scheduled content, not on the actual trends going on.
How to Avoid It: You should focus on what’s going on or what your target audience actually wants from you. Thereafter, you can plan a post that properly meets your brand.
Best Practices That I Followed For Scheduling Instagram Posts and Reels
These are as listed below:
- First, I make sure to check when my target audience is most active so that I can easily schedule my post according to the high peak time.
- You must have a healthy posting cadence, the way I have, like 1 reel per day and 2-3 standard photos per week.
- I highly recommend going with the native scheduling Instagram feature, as it doesn’t take my enough time. In addition, it doesn’t require any specifications to perform the steps.
- Make sure to build caption templates for your standard posts, such as product announcements, tips, and much more. By doing this, I have already sped up my drafting process, so why shouldn’t you?
- You can also add relevant keywords to your captions so that your post can easily rank in Instagram’s search engine.
Most Commonly Asked Questions and Their Answers
Check out these deeply researched additional questions on scheduling your Instagram posts and reels.
Q1. What tools do you use to schedule Instagram posts?
Ans. I use various tools for scheduling my Instagram posts. These are:
- Meta Business Suite
- Instagram’s native app scheduling feature.
- Some third-party social media tools, like Later, Buffer, or Hootsuite.
Q2. Can I schedule reels through Instagram?
Ans. YES! You can easily schedule your reels within your Instagram app, whether it is on Android or iPhone. Moreover, you can go with the Meta Business Suite as well.
Q3. Why can’t I schedule Reels?
Ans. There are some prime reasons behind this:
- Users might be using a personal account.
- You are trying to schedule your reels on your desktop.
- You have not updated your Instagram app yet.
Q4. How do I enable scheduling on Instagram?
Ans. First, make sure you have a professional, public, or creator profile. Afterwards, you can follow these instructions.
- Tap on + Create.
- Pick Posts or Reels.
- Choose your preferred media.
- Apply any filters. (If required) Tap Next.
- Go to the three horizontal dots or More options.
- Enable Schedule this Post or Schedule this Reel.
- Set your preferred time or date.
- Tap Done.
- Come to the Home screen and tap on Schedule.
Q5. Can you schedule Instagram posts on Meta Business Suite?
Ans. YES! Meta Business Suite lets you schedule your Instagram posts and reels on desktop as well as mobile-based devices.
Q6. Is Meta Business Suite good for scheduling posts?
Ans. YES! This scheduling tool, Meta Business Suite, is a good option. With this tool, users can easily plan their posts up to 90 days in advance, find the most effective posting times, and much more.
Q7. Did IG remove scheduled posts?
Ans. NO! As of 2026, Instagram has not removed the scheduling feature or your planned post. Users just need to make sure that they are using a public profile along with an updated version. Because this scheduling feature is hidden, you must have access to it.
Q8. What is the best time to schedule an Instagram post?
Ans. As per my research, there are some best times to get better and higher engagement.
- Mondays → 7 AM, between 1 PM and 2 PM, and in the evening from 5 PM to 7 PM.
- Tuesdays to Thursdays → Best time is between 12 PM and 3 PM. Plus, there is an evening time, 6 to 9 PM, for getting the highest engagement.
- Fridays → In the morning, 7 to 8 AM and 11 AM. For the evening, you should go at 2 PM, 4 PM, and between 8 PM and 9 PM.
- Weekends → Only between 8 AM and 2 PM, as there is very low chance of engagement.
Q9. How to see scheduled posts on Instagram from a desktop?
Ans. To view, you can use Meta Business Suite. Here, you will see all your planned content by tapping on the Content or Planner option.
Q10. How to edit scheduled posts on Instagram?
Ans. Follow these instructions to do so:
- Open your Instagram Profile.
- Go to Menu.
- Choose Scheduled Content under Your Insights and Tools.
- Tap on Options.
- Here, you can easily edit your scheduled posts on your IG account.